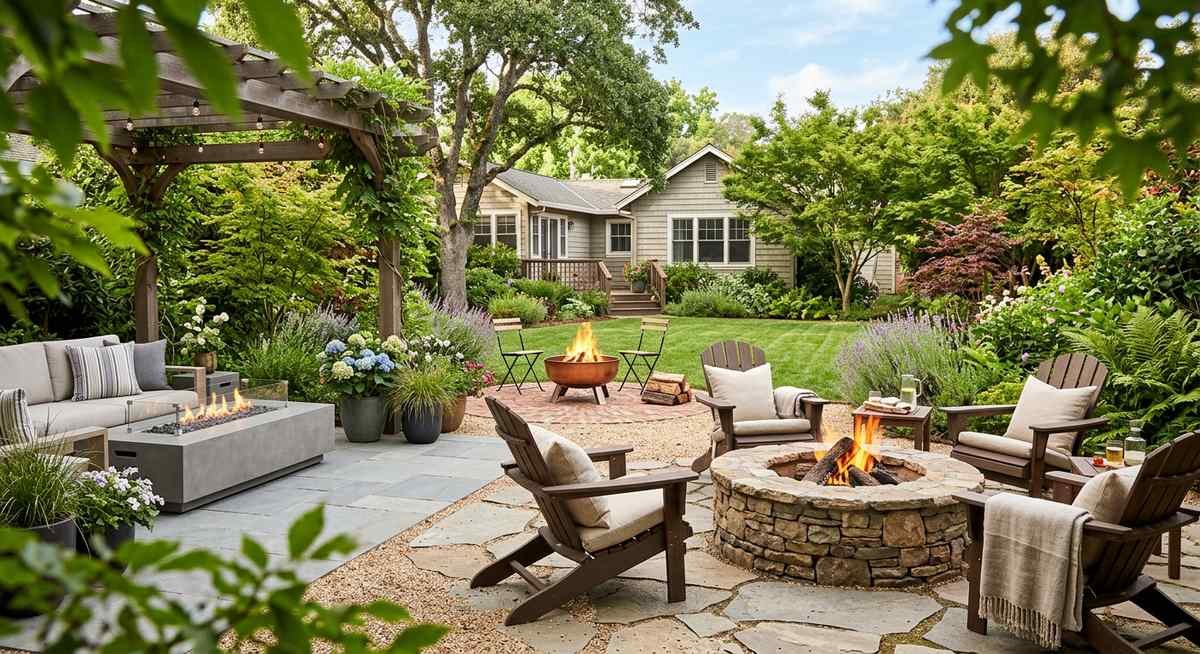
A backyard fire pit turns dead patio space into the spot everyone actually wants to hang out. After dinner, after dark, long past when anyone planned to head home. It’s also one of the better return-on-investment upgrades for a yard: a functional setup can cost under $50 in raw materials, while a fully landscaped seating area with custom hardscaping and integrated lighting runs several thousand.
The real problem isn’t a shortage of inspiration. It’s that most of it doesn’t apply to your actual situation. That stunning stone surround on Pinterest? Useless if your backyard is 400 square feet. The sprawling gravel zone with Adirondack chairs? Not happening on $200. And a rustic fieldstone ring will look out of place next to a modern concrete patio, no matter how many likes it got on Instagram.
This guide filters every fire pit idea through three things that actually matter: your budget, your yard size, and your design style. Match those three, and everything else falls into place.
Fire Pit Ideas by Budget: From Under $150 to Full Landscaped Installs
Budget is the fastest way to narrow your options. A steel ring on gravel works for under $75. A mortared stone surround with integrated hardscaping starts around $2,000. Knowing where you land saves hours of browsing ideas that were never realistic. The National Fire Protection Association (2023) reports that wood-burning fire pits are among the most common sources of residential outdoor fires, so surface and placement decisions carry as much weight as the budget itself.
Cheap Fire Pit Builds Under $150
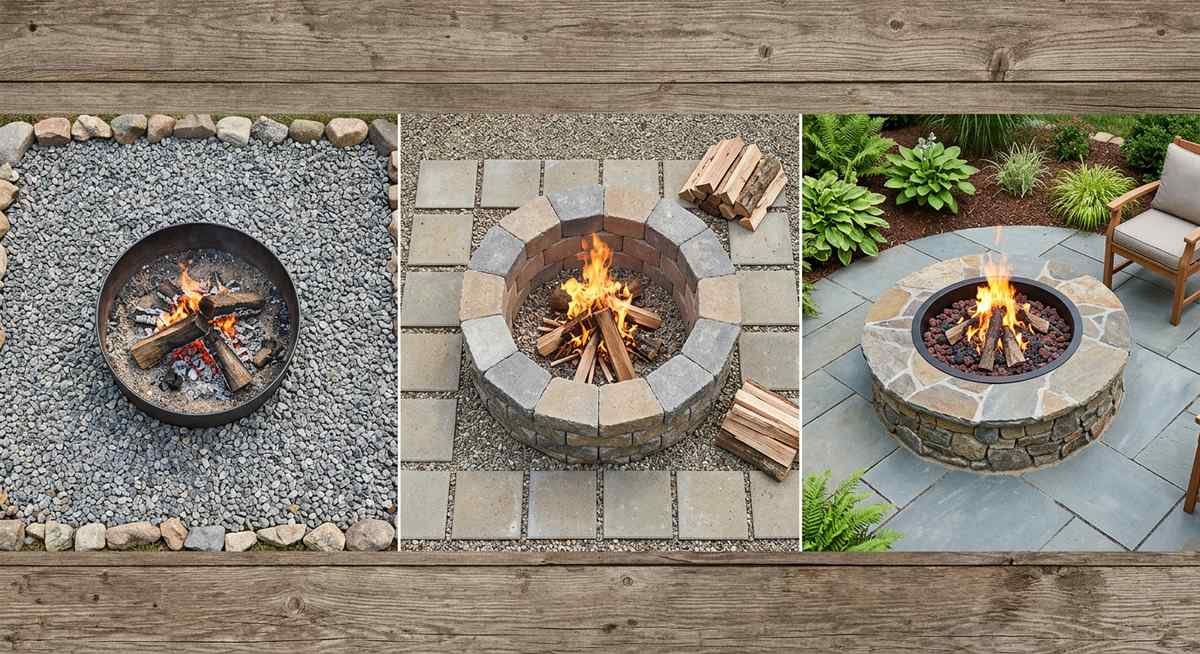
Three setups consistently stay under $150 without cutting corners on function. A steel fire ring dropped into a shallow hand-dug depression runs $30-$50 for the ring, plus $15-$25 for a bag of pea gravel to line the base. A concrete block pit built by stacking standard 8-inch retaining wall blocks in a circle costs $40-$80 and requires zero mortar or special tools.
The third option: a store-bought bowl pit on a small paver pad. Four 16-inch concrete pavers run $20-$30, and entry-level bowl pits go for $50-$80. All three are afternoon projects.
“You can get a bag of ‘lava rock’ to lay down at the base over the sand. It leaves large gaps between them, and is porous, helping with airflow at the base of the fire… My recommendation before you go crazy redoing anything or making a bunch of changes: Use it.”
— u/ThrowbackDrinks, r/DIY (March 2025)
| Setup | Estimated Cost | Tools Needed | DIY Difficulty |
|---|---|---|---|
| Steel ring + gravel base | $45-$75 | Shovel only | Beginner |
| Stacked concrete block pit | $40-$80 | None required | Beginner |
| Bowl fire pit on paver pad | $70-$110 | Level, rubber mallet | Beginner |
Mid-Range Fire Pit Builds ($150-$500)
This is the range where a fire pit stops looking thrown together and starts looking like you meant it. A dry-stacked retaining wall block surround with a 10-foot gravel pad runs $150-$250 in materials. Blocks average $1.50-$3 each, and a ton of pea gravel covers about 50 square feet at 2 inches deep. Add a pair of metal chairs or a split log bench and you’ve got a fire pit area that looks intentional without a contractor invoice.
Paver pads surrounding the pit fit comfortably here at $2-$5 per square foot for basic concrete pavers. On the landscaping side, ornamental grasses planted at the pad’s edge and a river rock border run $50-$100 and make a noticeable difference in how finished the whole thing looks.
Built-In and Landscaped Builds ($500+)
Above $500, you’re moving from assembled to constructed. Mortared brick or natural stone surrounds, poured concrete pits, and gas fire features all need more skill and time, but the results are permanent. A mortared stone surround with a matching paver patio typically costs $800-$2,500 in materials alone. Professional installation on a full hardscaping project with retaining walls and planting beds can reach $5,000-$15,000 depending on scope and region.
“Took me 4 months to complete the build and a grand total of $2,479.56. Overall I’m super happy with how it turned out. Only thing I might have changed is the brick used for the retaining wall. I went with the cheapest brick but I think that’s something I should’ve been willing to spend more money on.”
— r/landscaping user (December 2024)
The DIY-versus-hire decision here comes down to two things: gas line work and structural footings. Gas fire pit installations require a licensed plumber or gas fitter in most jurisdictions. Poured concrete and mortared masonry are doable for experienced builders, but first-timers regularly underestimate the labor involved in getting level, clean results.
Fire Pit Ideas by Backyard Size: Small, Medium, and Large Yards
Small yards under 800 square feet work best with corner-placed, low-profile pits on compact gravel pads. Medium yards (800-2,500 sq ft) can support a centered pit with a full paver surround and dedicated seating ring. Large yards over 2,500 square feet have room for multi-zone layouts with pergolas, bar counters, and built-in seating walls. The American Society of Landscape Architects (2023) ranks fire features among the top five most-requested outdoor living elements, which means placement decisions matter more than ever in maximizing both function and resale value.
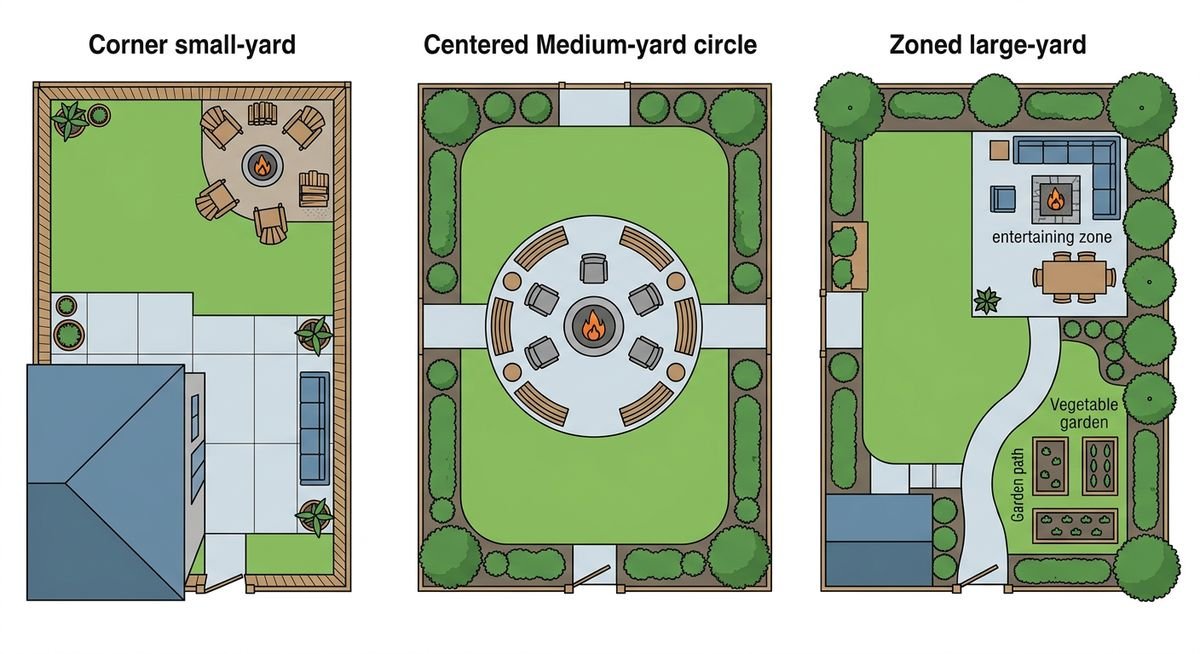
Small Backyards (Under 800 sq ft)
Corner placement is the move for a tight yard. Tucking a fire pit into an unused corner reclaims dead space, puts two fence lines to work as a windbreak, and leaves the center of the yard open for other use. A low-profile in-ground pit recessed 8 to 12 inches keeps sightlines clear and avoids the visual bulk of a raised ring or block surround.
For seating, built-in bench walls made from retaining wall blocks pull double duty as both seating and a low border, eliminating freestanding chairs that eat up square footage. Foldable chairs are the budget alternative. Either way, keep the seating area tight: a 6-foot diameter gravel pad handles four people comfortably in a compact yard.
Pea gravel is the go-to ground cover for small-yard builds. At roughly $0.50 to $1.50 per square foot, it installs in an afternoon, drains well, and makes even a modest corner setup look deliberate rather than improvised.
Medium Backyards (800-2,500 sq ft)
A medium yard can support a fully defined fire pit area without eating the rest of the lawn. The classic layout at this scale: a centered pit on a circular gravel or paver pad, 10 to 12 feet in diameter, with paver paths radiating out toward the house and garden borders.
Ornamental grasses along the perimeter add structure without maintenance headaches, and a steel or stone edging border keeps hardscaping materials contained. For yards where a hard surface isn’t practical, grass under a fire pit is workable but only with a heat shield or ember mat underneath and a minimum 10-foot clearance from anything combustible.
“The gravel/paver base underneath the firepit itself is usually for drainage, so your firepit doesn’t become flooded after a heavy rain. It’s not needed, but it is a nice convenience. People also like to bury pavers underneath around the outside of the pit to help with the ‘stiletto effect’ of chairs sinking through the ground.”
— u/hangmandelta, r/DIY (March 2025)
Large Backyards (Over 2,500 sq ft)
Large yards have the luxury of dedicated zones. A fire gathering area, a dining patio, a play zone for the kids, and a lounging lawn can each occupy their own space without competing for square footage. A permanent open-sided structure overhead (a gazebo or pergola) anchors the fire zone visually and extends usable evenings into cooler months by blocking wind and light rain.
A built-in bar counter with a mini-fridge and firewood storage, positioned 8 to 10 feet from the pit, keeps the entertaining flow self-contained. Nobody has to walk back inside for drinks or supplies.
| Yard Size | Recommended Pit Style | Ideal Surface | Seating Approach | Key Landscaping Move |
|---|---|---|---|---|
| Small (<800 sq ft) | In-ground or low-profile ring | Pea gravel pad (6-8 ft dia.) | Built-in bench wall or foldable chairs | Corner placement + pea gravel surround |
| Medium (800-2,500 sq ft) | Raised block or steel bowl | Gravel or paver circle (10-12 ft dia.) | 4-6 Adirondack or metal chairs | Radiating paver paths + ornamental grass border |
| Large (>2,500 sq ft) | Built-in stone or gas fire pit | Paver or concrete pad | Curved sectional or mixed seating zones | Gazebo or pergola overhead + bar station |
Fire Pit Surface and Ground Cover: Gravel, Pavers, Concrete, and Grass Compared
Gravel is the most practical and affordable ground cover for a fire pit area at $0.50-$1.50 per square foot installed. Pavers deliver a cleaner finished look at $2-$8 per square foot. Concrete is the most permanent option at $3-$10 per square foot poured. Grass, tempting as it is for simplicity, carries real fire and heat risks that make it the worst bare surface for this job. The U.S. Environmental Protection Agency (2025) notes that residential fire pits can be a considerable source of fine-particle air pollution, making surface choice and ventilation safety factors worth taking seriously.
Gravel and Pea Gravel Surrounds
Gravel drains well, stays cool underfoot, and installs in an afternoon with no special tools. Pea gravel specifically has a soft, rounded texture that leans cottage or naturalistic. One important detail that gets overlooked: contain the stone with steel or plastic landscape edging. Without it, gravel drifts into the lawn within a season.
Paver and Brick Surfaces
Pavers sit at the intersection of DIY-friendly and genuinely polished. Most homeowners can lay a circular or square pad over a compacted gravel base without hiring anyone. A square layout pairs well with grid-pattern concrete pavers for a modern or transitional look. Pavers also integrate naturally with an existing patio, making the fire pit feel like a planned addition rather than a weekend impulse.
Concrete Pads and In-Ground Builds
Poured concrete works well for modern fire pit setups: the surface is seamless, easy to clean, and holds up to heavy furniture without shifting. An in-ground pit recessed flush with the pad reduces wind interference and keeps sightlines open across larger yards. In climates with hard freezes, expansion joints are non-negotiable. Without them, a poured slab will crack within two or three winters.
Can You Put a Fire Pit on Grass?
Placing a fire pit directly on grass is risky. A standard wood-burning pit radiates enough heat to scorch turf and can ignite dry grass from airborne embers. At minimum, place a heat shield or ember mat rated for outdoor fire use underneath any portable unit on lawn.
“My neighbor asked me to build a massive fire pit out of river rocks, after several weeks I finished it and we learned river rocks have a chance to explode in fires due to water inside them and we’re both too scared to use it.”
— r/mildlyinfuriating user
The safer upgrade is a gravel or paver island: a 10-foot-diameter pad costs under $200 in materials and eliminates the surface risk entirely while giving the whole area a more finished look.
| Surface Type | Cost (Materials) | DIY Difficulty | Drainage | Best For |
|---|---|---|---|---|
| Pea Gravel | $0.50-$1.50/sq ft | Easy | Excellent | Budget builds, cottage aesthetic |
| Pavers / Brick | $2-$8/sq ft | Moderate | Good (with base) | Patio extensions, formal layouts |
| Poured Concrete | $3-$10/sq ft | Hard (or hire out) | Poor (needs slope) | Modern designs, in-ground pits |
| Grass (with mat) | $20-$60 (mat only) | Easy | Natural | Temporary or portable setups only |
Design Styles: In-Ground, Square, Gas, and Corner Configurations
Round, wood-burning, ground-level fire pits remain the most common residential style in North America. But square designs, gas-powered units, and built-in masonry surrounds have gained steady ground since 2020. The style you pick affects cost, maintenance, fuel logistics, and the overall feel of the outdoor space. A modern square gas pit reads completely differently than a rustic fieldstone ring.
In-Ground and Built-In Fire Pits
A recessed pit sunk 8-12 inches into a concrete or paver pad sits flush with the surrounding surface. The look is sleek, wind exposure drops, and the fire sits lower, which matters if you have young kids or pets in the yard. The trade-off is drainage: in-ground pits need a gravel base layer and ideally a drain pipe to prevent water pooling after rain.
Built-in stone or block surrounds with integrated cap seating take the concept further. A 36-inch interior diameter ring built from stacked natural stone or cast concrete blocks runs $300-$800 in materials and works as a permanent landscape anchor.
Square and Rectangular Designs
Square fire pits pair naturally with modern architecture, grid-pattern paver patios, and linear furniture arrangements. A square fire table (typically 30 to 44 inches per side) creates a more structured gathering point than a round pit and works especially well on rectangular patios where a circle would waste corner space.
Gas Fire Pits: Propane and Natural Gas
Propane and natural gas pits eliminate wood smoke, ash cleanup, and ember risk entirely. A propane fire table with a hidden tank compartment costs $250-$600 for a quality unit. Plumbed natural gas lines run $500-$2,000 for installation but provide unlimited fuel with zero refilling.
“When we were building our house I knew I wanted to put a fire pit out overlooking our creek. My wife had asked for me to put a propane fire pit out there and I really just hated the idea of propane out there instead of wood. So I watched an absolute ton of YouTube videos and tried to find as much information as I could about the geometry of the Solo Stoves.”
— r/DIY user (December 2024)
Gas units produce consistent, adjustable flames, which is a practical advantage when smoke drifting into dining areas would ruin the evening. Gas fire features also carry lower wildfire ignition risk than wood-burning alternatives, which is why many suburban municipalities now encourage or require them in high-density residential zones.
Corner Placement
Corners solve two problems at once: they reclaim unused dead space and create a natural windbreak against two fence lines or walls. An L-shaped built-in bench paired with a corner pit transforms an overlooked 8×8-foot area into the most-used spot in the yard. This works particularly well for small or irregularly shaped lots where a centered pit would crowd everything else out.
Seating, Lighting, and Decorating Ideas for Fire Pit Areas
Seating layout and lighting determine whether a fire pit area gets used once a month or every evening. Position seating 6-8 feet from the pit center for the right balance of warmth and comfort, then layer in ambient light to keep the space inviting after dark.
Seating Ideas and Configurations
Curved benches, Adirondack chairs, and built-in retaining wall seating each suit different yard sizes and budgets. For a dedicated fire pit area, a semi-circular arrangement of 4-6 chairs creates the most natural conversation flow. Built-in block benches with stone caps cost $200-$500 in materials and eliminate the seasonal drag-furniture-in-and-out routine.
“Nobody wants to sit on a hard rock wall.”
— u/Annual_Judge_7272, r/landscaping
“You need movable seating for wind direction changes.”
— u/Zoomies87, r/landscaping
Both points are worth keeping in mind. If you go with built-in stone benches, add outdoor cushions for comfort. And regardless of your main seating, keep at least a couple of lightweight chairs around that people can shift when the wind changes.
Hanging porch swings flanking the pit have surged in popularity. A pair of swings mounted on an A-frame or pergola structure creates a distinctive setup that also keeps riders at a consistent distance from the fire. Swing hardware (heavy-duty eye bolts, chain, commercial seats) runs $150-$300 per station; the supporting structure adds $200-$800.
Lighting and String Lights
String lights are the single fastest way to upgrade the atmosphere after dark. Commercial-grade LED strands rated for outdoor use run $25-$60 for a 48-foot strand and can be strung between fence posts, trees, or dedicated 4×4 cedar poles set into concrete footings. Warm white (2700K) mimics firelight naturally. Cool white or multicolor LEDs fight the ambiance.
Beyond strings, solar-powered path stakes lining the walkway to the pit ($20-$40 for a 10-pack), low-voltage LED strip lights recessed under bench edges, and flameless LED pillar candles on the surround all layer well. Two light sources beyond the fire itself is the minimum. The flame alone creates harsh shadows that make the space feel smaller than it is.
Decorating the Fire Pit Zone
Stick with weather-resistant textures that can take a season outdoors. Throw pillows in Sunbrella or olefin fabric, a galvanized steel firewood rack, and a heavy ceramic planter with drought-tolerant ornamental grass at each corner of the seating area add weight and character without needing constant babysitting. Seasonal touches rotate the look: a wrought-iron lantern cluster in fall, a citronella candle grouping in summer.
Fire Pit Safety, Placement Rules, and Permit Basics
Most U.S. municipalities require a minimum 10-foot clearance between any fire pit and combustible structures, fences, or overhanging branches. Some jurisdictions push that to 25 feet. The U.S. Fire Administration (2022) estimates that outdoor fires, including residential fire pits, account for roughly 10,600 structure fires annually when placement and surface rules are ignored.
“I live in a small city, so we have lots of very specific ordinances, and we’re required to have a dirt base in our firepits.”
— u/EViLTeW, r/DIY
Before breaking ground, check three things: local burn ordinances (some cities ban open flames entirely during dry seasons), HOA restrictions on permanent structures, and whether a gas line installation requires a permit. Permanent fire pits over a certain height or diameter may need a building permit in some counties. One call to the local fire marshal’s office takes five minutes and can prevent a fine or a forced teardown later.
Smokeless Fire Pits: Solo Stove, Breeo, and Alternatives
Smokeless fire pits have become a category of their own. Brands like Solo Stove and Breeo use double-wall airflow designs to achieve secondary combustion, which burns off most of the smoke before it reaches your face. These units typically cost $200-$500, burn regular firewood, and produce dramatically less soot than traditional open pits.
“I got a Solo Stove (no affiliation) and it was worth every penny. Dang near smokeless.”
— r/camping user
Smokeless pits are especially practical for suburban lots where neighbors are close enough to be affected by wood smoke. The trade-off: less radiant heat compared to a traditional open fire, and the signature campfire smell is mostly gone too.
| Fuel Type | Avg. Cost to Set Up | Ongoing Fuel Cost | Smoke Level | Maintenance | Best For |
|---|---|---|---|---|---|
| Seasoned firewood | $0 (if wood-burning pit) | $5-$8 per evening | High | Ash removal after each use | Traditional ambiance, large yards |
| Propane (tank) | $250-$600 (fire table) | $15-$25 per tank refill | None | Minimal — wipe burner annually | Patios, small yards, smoke-free zones |
| Natural gas (plumbed) | $500-$2,000 (line install) | $0.50-$1.50 per hour of use | None | Annual valve inspection | Permanent installs, frequent use |
| Smokeless fire pit | $200-$500 (Solo Stove, Breeo) | $5-$8 per evening (wood) | Very low | Ash removal, less soot | Suburban yards, neighbor-close lots |
Frequently Asked Questions
What is the best surface to put a fire pit on in a backyard?
Gravel, pavers, and concrete are the three safest surfaces for a backyard fire pit, all non-combustible and durable. Pea gravel is the most budget-friendly at roughly $0.50-$1.50 per square foot, while concrete pavers offer a cleaner, more formal look at $2-$8 per square foot for materials. The right choice depends on budget and how permanent the setup needs to feel.
How far should a fire pit be from a house or fence?
At least 10 feet from any house, fence, or overhanging branch. Some municipalities require 25 feet. The International Code Council residential fire code sets 10 feet as the baseline minimum for portable wood-burning units. Overhead clearance matters as much as horizontal distance, especially when a roof or pergola sits directly above.
Can you put a fire pit directly on grass?
Technically yes, but it’s a bad idea without protection. Radiant heat from a standard steel bowl can scorch grass and dry the soil enough to ignite roots. Embers travel farther than most people expect. At minimum, use a commercial ember mat or heat shield underneath. A gravel or paver island (even an 8-foot-diameter ring) is a far safer upgrade for under $100 in materials.
What is the cheapest way to build a backyard fire pit?
A basic in-ground ring dug from the lawn and lined with standard concrete blocks costs as little as $30-$60 in materials. A steel fire ring on a gravel pad can come in under $80 total. Both are fully DIY-friendly with no special tools. The block pit takes about 2-3 hours with a shovel and a level.
What seating works best around an outdoor fire pit?
Adirondack chairs, curved concrete benches, and built-in retaining wall benches are the three most practical options. Position seating 6-8 feet from the pit center. For small yards, L-shaped built-in benches anchored to a corner wall maximize capacity without eating into surrounding space. Just remember that movable chairs are a practical advantage when wind shifts direction mid-evening.
How do you landscape around a backyard fire pit?
Start with a non-combustible border (river rock, steel edging, or concrete curbing) to separate the fire zone from lawn. Plant low-growing, drought-tolerant species like ornamental grasses, lavender, or creeping thyme just outside the gravel or paver surround. Raised garden beds positioned 6-8 feet beyond the heat zone make a practical companion feature. Keep all plantings at least 3 feet from the pit edge; radiant heat dries nearby soil faster than most people realize.
What are the best DIY fire pit projects for beginners?
A stacked concrete block ring on a gravel pad. No mortar, no cutting, under $80 in materials. Arrange 24-30 retaining wall blocks in a 36-inch circle, two courses high, on a level bed of compacted gravel. The whole project takes 2-3 hours with a shovel and a level.
Do fire pit rules differ in Australia?
Significantly. Australian regulations are stricter than U.S. rules, especially during declared Fire Danger Periods. Most states require fire pits on non-combustible surfaces with at least 3 meters of clearance from structures and fences. Total fire bans, common between November and March, prohibit all outdoor fires including residential fire pits. Check your local council and the Country Fire Authority (CFA) or Rural Fire Service (RFS) website before installing.
What is a good setup for a fire pit party?
Three zones: seating around the pit (6-8 feet back), a drink and food station (a portable bar cart or built-in counter 8-10 feet away), and ambient lighting overhead. String lights on a timer, a Bluetooth speaker, and a firewood rack stocked for the evening handle the essentials. A s’mores station with a small folding table near the pit is the easiest crowd-pleaser to add.
| Question | Quick Answer |
|---|---|
| Best surface material | Gravel, pavers, or concrete — all non-combustible |
| Minimum clearance from structures | 10 ft (check local codes — some require 25 ft) |
| Safe on grass? | Only with ember mat; gravel island strongly preferred |
| Cheapest DIY build | In-ground concrete block ring: $30-$60 |
| Ideal seating distance from pit center | 6-8 feet |
Wrapping Up
Every fire pit decision traces back to three filters: budget, yard size, and design style. Get those three right and every other choice (fuel type, surface material, seating layout, lighting) follows naturally. A $75 steel ring on a gravel pad with four chairs can outperform a $3,000 install that ignores traffic flow and seating distance.
Start with the ground beneath the pit and the seating arrangement around it. Those two decisions shape everything about how the space looks, works, and feels after dark. The seating area is the room. Build it first, decorate it second, and call your local fire marshal before either.